
 dailynewsnblog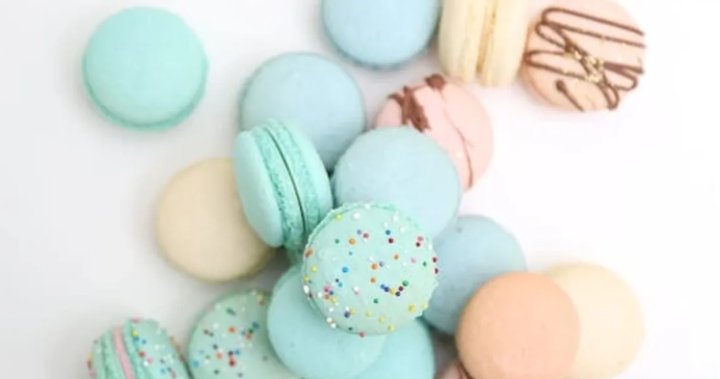
Kizzy’s macaron recipe ♡:

For the shells:
● 180g Finely ground almond flour (Costco almond flour works best!)
● 170g Icing sugar
● 130g Burnbrae Liquid egg whites (room temperature is best!)
● 15g Cream of tartar
● 150g Granulated sugar
● For chocolate shells add in 5-10g of cocoa powder to the sifted dry ingredients
Note: The flavor of the macaron is generally always in the filling, unless using a dry addition, such as spices or cocoa powder.
Adding dry decorations to the shells as soon as they have been piped out works well, as long as they can withstand the high temperature during baking time. Examples: Sprinkles, gold flake & sanding sugar.
To start: Weigh out dry ingredients.
1. Using an electric kitchen scale, weigh both the almond flour & icing sugar into a Tupperware container. Once both are weighed together, secure the lid. ( Make sure it is securely on as the next part can get quite messy if not!)
2. Shake the Tupperware for 5 to 10 seconds to mix up almond flour and icing sugar. Next, using a big bowl & handheld sifter pour dry ingredients into the handheld sifter and sift through into the bowl.
1. There should be no large pieces of almond flour left visibly in the sifter once completed, however smaller bits that may not fit through the mesh are fine to add into the dry ingredient mix!
2. Once sifted, pour dry ingredients back into tupperware. This step should always be completed before beginning to mix up the egg whites. You also may sift multiple batches at a time and have them sit, but never let them sit in the container for more than a day or two, as the icing sugar can start to absorb the moisture of the almond flour & produce a different end result!
Next step : Weigh out wet ingredients
1. Using the electric kitchen scale, place the mixing bowl on scale and tare weight to 0. (Always make sure the mixing bowl is clean and free of any oily residue.

Get breaking National news
Get breaking Canada news delivered to your inbox as it happens so you won’t miss a trending story.
2. Pour egg whites directly into mixing bowl until scale reads 130g.
3. Tare scale to 0 & pour 150g of granular sugar directly into mixing bowl.
4. Tare scale to 0 & pour 15g of cream of tartar into mixing bowl.
Note: Granular sugar & cream of tartar can be overweighed by up to 10 g & will not alter final result if over poured.
Now we have both our dry and wet ingredients ready to go, we can start to whip up the egg whites.
When whipping egg whites, it is always best to use a stand mixer. Using a handheld mixer may result in an inconsistent meringue base.
1. Place the mixing bowl on a stand mixer and begin to whisk wet ingredients on medium-high speed. I use an 8 speed on a kitchenaid mixer. Never whip at high speed.
2. Whisk egg whites until stiff, glossy peaks begin to form. Turn off the mixer and pull up the whisk attachment. If egg whites are nice, glossy and hold their shape, color can now be added. For white macarons, skip this step. If the mixture runs off the whisk attachment, egg whites are under whipped and need to be whipped for longer.
3. If using color add desired drops of gel based color & whisk color in quickly on medium high speed for 5 seconds. Whipping longer can over whip the egg whites so it is best to keep this step short.
4. Pour all the dry ingredients into the mixing bowl & use the preferred method to fold in dry ingredients into the egg whites.
5. Make sure that all dry ingredients are fully incorporated & that the macaron batter has a grainy lava like consistency. If the batter is very runny and is not holding its shape, the egg whites have been underwhipped.
6. Once desired consistency is achieved, transfer batter to a piping bag or piper & begin to pipe out the shells onto the silicone baking mat.
7. Make sure to keep the piping tip at the same height and straight up when piping out shells. I recommend holding the tip about a cm above the silicone mat and keeping it at the same height while pushing the batter through the tip. If using the macaron template, always aim to fill the first circle as the shells will slowly spread to the second outer circle after a few seconds.
8. Once the silicone baking mat has been filled, tap the bottom of the tray to release any air bubbles. Do not over tap as this can cause the shells to spread even more and may cause them to spread into each other.
9. Now that we have our glossy shells, if desired this is the time to add any dry decorations to the shells. Shells will begin to rest and change from glossy to matt looking & become dry to the touch. This is when we can see the macaron ‘skin’ has formed and the shells are now ready to be baked. Resting macarons can take between 20 minutes to an hour. I find it best to work in a warm kitchen so shells dry quickly.
10. During the resting period, pre-heat over to optimal temperature. This can be between 300-350 degrees. Temperatures for baking can be extremely different for every oven. You may need to find a good baking temperature for your oven through trial and error. It’s best to use an oven thermometer to see if your oven is baking at the temperature it is set to. Some ovens may be set at 325 degrees but actually have an internal temperature of 350 degrees. Hot and cold spots can also be found in many ovens, so it’s best to use the convection setting to make sure the over air is circulating & not stagnant.
11. Bake macarons for 15-20 minutes, depending on oven temperature. Some trays may need to be turned 180 degrees mid-baking & switched from the top to the bottom rack to achieve a good macaron shell consistency.
12. Once macaron shells have been fully baked remove the trays from the oven and let the trays cool completely before removing the silicone mat & macaron shells. This can take anywhere from 30 minutes to 2 hours.
13. To remove the shells, peel them off the silicone mat, do not pull them straight up as they may stick.
14. Once all shells have been peeled off & matched up with a buddy shell, fill with desired flavor(s)!
15. Place filled macarons in an airtight container and place in the fridge for 24 hours so the filling can seep into the shells and become soft and chewy.
16. Macarons should be enjoyed at room temperature.
17. Once baked, they will keep fresh for about 7 to 10 days refrigerated. Macaron shells & filled macarons can also be frozen; they freeze very well.