 dailynewsnblog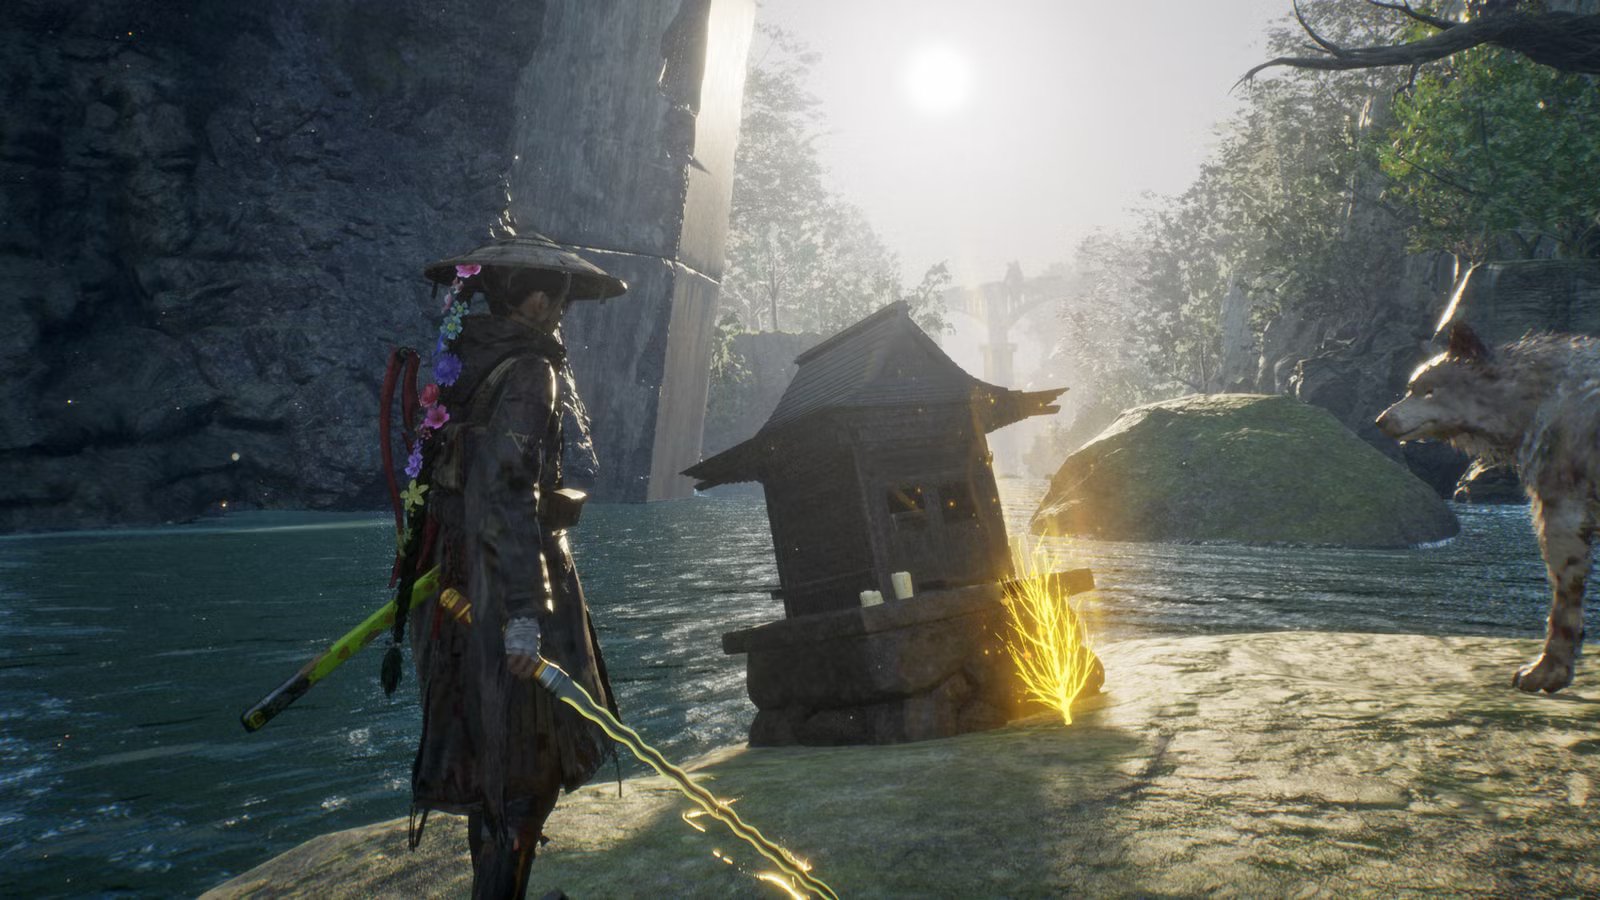
Be sure to find all the shrine locations in Beast of Reincarnation, as it will boost the maximum number of stimpacks you can carry to a whopping total of eight. Stimpacks are your go-to health recovery items, so it’s always useful to obtain more, but don’t expect an easy task; shrines, also known as dragon vein shrines, are often hidden in easily missable corners of the world.
To make sure you get your stimpack upgrades, here’s where to find every dragon vein shrine in Beast of Reincarnation.
Update (Aug. 5): We’ve updated this guide to include all shrine locations.
All shrine locations in Beast of Reincarnation
Beast of Reincarnation contains 40 dragon vein shrine locations. If you get close enough to a shrine, it will be marked on your map. While the marker won’t be removed if you leave an area, you must interact with a shrine to make it count toward the total. Besides stimpack upgrades, interacting with a shrine awards three life fruits, which are crafting ingredients used for Koo’s items.
You’ll receive the first stimpack upgrade (officially called a “dragon’s favor”) upon finding your first shrine, which will likely happen when you arrive in the Ancient Civilization Zone. The first map, Ogouchi Buffer Zone, does not contain any shrines. You will receive the next stimpack upgrades when you unlock a total of 10, 20, 30, and 40 shrines, respectively. In other words, you can gain five additional stimpacks by finding shrines in Beast of Reincarnation.
All shrine locations in the Ancient Civilization Zone in Beast of Reincarnation
The Ancient Civilization Zone contains three shrines. Be careful not to miss the third one, which is further from the main road.

- When you encounter the bulkhead, take the path upward to the right. At the top of the wall, you’ll find the first shrine.
- It’s below ground. Starting from the Reservoir: Interior campfire, walk northeast until you reach the shrine (it’s in the same cave chamber).
- It’s on a ledge high above the main road. The easiest way to reach this shrine is to climb onto the rusty pipe to your right as you walk northeast (be sure to grab the armor inside the rusty pipe while you’re there) and keep climbing upward from there.
All shrine locations in The Great Wall Terraces in Beast of Reincarnation
There are many shrines in The Great Wall Terraces, and most of them are easy to miss. Be especially mindful of the second and sixth dragon vein shrines, as they only pop up if you take the trouble to explore the ravine.

- Pass the Mountain Village: Entrance campfire. At the western border, on the right side of the village, you’ll find this dragon vein shrine location.
- Instead of passing the bridge to the east, descend into the ravine. At the bottom of the bridge, on the south side, you’ll find a shrine.
- Pass the large bridge to the east, where you’ll find the Great Forest: Entrance campfire, and go northwest from there. The shrine is at the foot of a large statue.
- Go to the highest part of town, one level above the Mountain Overlook campfire.
- It’s next to the Flower Square: Forefront campfire.
- It’s on a small island in the middle of the river, close to the Hidden Stone Hall campfire.
- Climb the buildings behind the Ruined Road Square campfire.
- Enter the building behind the Ruined Temple Entrance campfire and take the stairs on the north side.
All shrine locations in the Pilgrim’s Zone in Beast of Reincarnation
There are more dragon vein shrine locations in the Pilgrim’s Zone than you might think, as locations one, two, six, and seven, are quite far from the main path.

- It’s on a cliff high above the main road. Climb the old aqueduct to get there.
- Instead of turning east toward the cave entrance (following the story), keep walking north across the Scorched Grasslands. After a while, you’ll find the shrine on the right side of the path.
- From the Cave Entrance campfire, follow the road north as far as possible. The shrine sits at the foot of a large statue.
- Turn your back to the large statue and follow the path to the west. Inside the large chamber full of old scaffolding, crawl through the small, candle-lit cave opening to your right. The shrine is on the ledge opposite the large statue.
- It’s on the large stone building, top floor. Starting from the Stone Chamber Interior campfire, walk to the southwest.
- Starting at the previous shrine location, climb onto the building’s western wall. From there, use Emma’s hair ability to reach the cliff with the shrine.
- Starting from the Nushi’s Lair Entrance campfire, climb the cliff to the east.
All shrine locations in the Matsukawa Zone in Beast of Reincarnation
The Matsukawa Zone shrines are only found in two concentrated areas; the crater and adjacent valley in the north, and the gigantic square building in the southwest. Shrines four to nine are placed around the large rotating cylinder, which is quite tricky to navigate, so it might be helpful to walk from shrine to shrine in the same order as the list below.

- After following the path north from the Cave Entrance campfire, you’ll find a large crater with a building in the middle. The shrine is inside the building, on the lowest floor.
- After passing the crater that held the previous dragon vein shrine, you’ll find this shrine on your left (while still on the high wall).
- Starting from the previous dragon vein shrine, drop down into the large valley. The next shrine is inside a ruin to the north.
- Directly after entering the Matsukawa Colony building, you’ll see a massive cylindrical device in front of you. Instead of going down (following the story), use the platforms to your left and right to climb onto the cylinder’s first ledge instead, where you’ll find a shrine.
- From the previous shrine location, take the path leading upward to the south, where you’ll find the Tranquil Hall campfire. There’s a shrine inside the room behind it, though beware that it’s guarded by an elite enemy.
- Return to the Tranquil Hall campfire. Climb the scaffolding to the northwest to find another shrine.
- On the same level as the Tranquil Hall campfire, a bit further northeast, find the Hall of Silence campfire. Defeat the golems in the room behind it to unlock a second room containing a dragon vein shrine.
- Starting from the Hall of Silence campfire, jump across the platforms to the north (leading upward) to find the Mausoleum campfire. There’s a shrine in the room behind it (also guarded by an elite enemy).
- Starting from the Mausoleum campfire, use Emma’s hair ability to reach the rotating cylinder’s highest ledge, where you will find both the Matsukawa Colony (Top Level) campfire and a shrine.
All shrine locations in the Fuji Frontier Zone in Beast of Reincarnation
Despite being a largely linear zone, the Fuji Frontier Zone still contains a few tricky shrine locations. Since you can’t spot them from the main road, be careful not to leave before you’ve found shrines three to five.

- Right after entering the Fuji Frontier Zone, you’ll find this shrine along the main road, right in front of the steep stairs.
- It’s on the ground, across the large crater.
- Starting from The Branching Nushi campfire, after following the path northeast for a while, you’ll find this shrine in the open, outdoor area, on a ledge to your right. You’ll get there right after you exit the golem-guarded caves, but before you enter the room with the two deer.
- Starting from the Defense Outpost: Interior campfire, instead of taking the main path south, go southeast. The shrine awaits at the end of this path.
- Starting from the Defense Outpost: Wall campfire, walk to the ledge in the southeast (with the ladder and the burning golem remains). Drop down from ledge to ledge until you reach the bottom one, where you’ll find the shrine next to a rusted golem.
All shrine locations in the Giant Tree Zone in Beast of Reincarnation
Due to its vertical structures and many cable car connections, the Giant Tree Zone is difficult to navigate. While the first two shrines are on the main route, beware that shrines three and four are very easy to miss.

- It’s in the same building as the Ruined Tower Interior campfire, on the bottom floor. You can recognize the tall tower by the red smoke — the yellow cable cars can take you there.
- It’s just south of the Giant Tree: Feeding Grounds campfire.
- First, find the Cableway Line 0: Base Station campfire, which is northeast of Cableway Line 1: Base Station. Climb to the top of the building, but instead of taking the nearest cable car, take the one further north, next to the talking golem. After you hop off, walk straight north to find the Cableway Line 2: Peak A campsite. From there, walk northeast, look down, and you’ll see the shrine is on a lower ledge a bit further ahead.
- This shrine is next to the Giant Tree Roots (Middle Level) campsite, but reaching this campsite involves a lengthy cableway trip. Starting at the Cableway Line 2: Peak A campsite (like the previous shrine location), take cable car 2 toward the west. Cross the broken bridge, passing a bunch of minor enemies, and you’ll see some steel construction ahead of you. There’s a cable car on your right, and another one to your left (further away). Take the one to your left, next to the Cableway Line 2: Checkpoint campsite. At the next stop, walk toward the south to find the Cableway Line 2: Terminal Stop campsite. Keep moving southwest through the forest until you reach the Giant Tree Roots (Middle Level) campsite and the shrine.
All shrine locations in the Crater Zone in Beast of Reincarnation
There’s only one dragon vein shrine in Beast of Reincarnation‘s Crater Zone. Starting from the Lake Base: Interior campsite, follow the path northeast, into the building, to find the shrine. This shrine location is on the main story path, but you’ll be circling the large building in the northern part of the Crater Zone for a while before you reach it.

All shrine locations in Starfall Tower in Beast of Reincarnation
There’s only one dragon vein shrine in Starfall Tower. Starting at the In Front of the Lab campsite, as you follow the road north, you’ll find the shrine on your left side, behind a fence. It’s placed behind the bear malefact, but before the Nushi’s Lair Entrance campsite.

All shrine locations in The Capital in Beast of Reincarnation
The final two dragon vein shrines are found on Beast of Reincarnation‘s final map. Both are near the main path, though beware that you might still miss them if you rush through.

- Opposite the Sewage Works: Ingress campsite. After entering The Capital, walk straight ahead to get there.
- Follow the story to find the Urban Area: Ingress campsite. From there, walk upstairs, pass through the corridor, and turn right to find the shrine.