 dailynewsnblog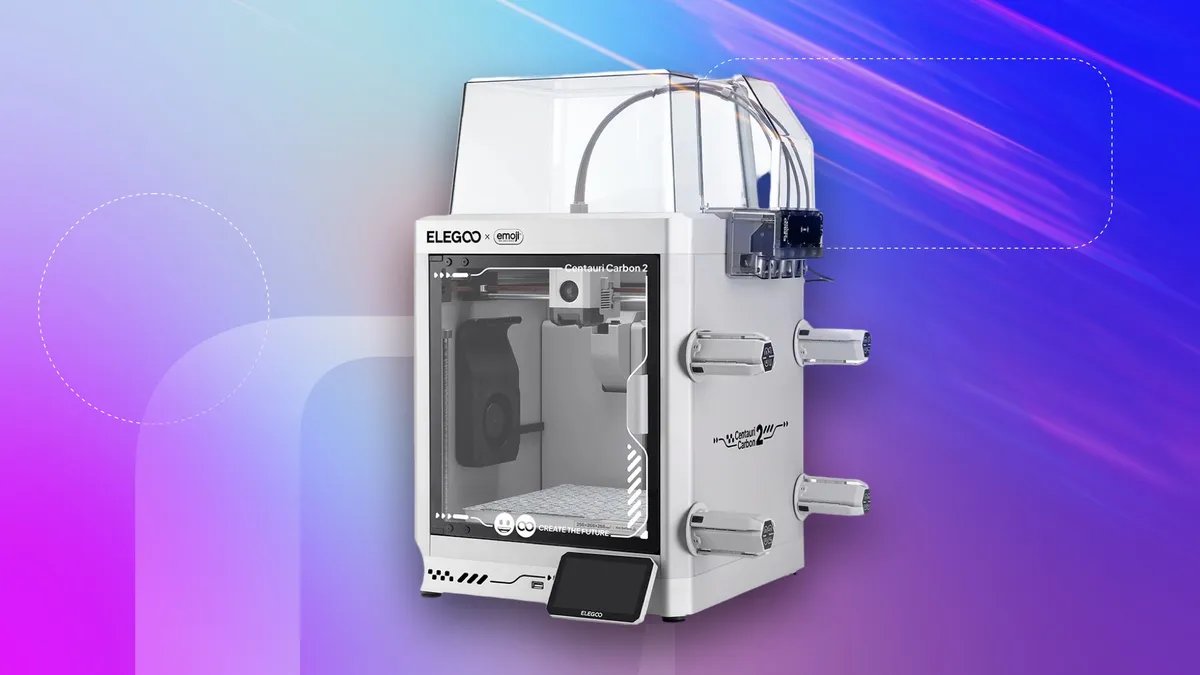

Pros
- Easy to load and execute prints
- Capable of surprising detail
- Highly capable, intuitive slicer software
- Approachable for newbies but fully-featured enough for experienced users
Cons
- Lengthy setup
- Significant vibrations
Despite the sheer magic and wonder of creating fully three-dimensional objects from the ether like you’re using a Star Trek replicator, 3D printers have something of a stodgy reputation. They’re often seen as highly technical, difficult to use or only accessible to a nerdy niche willing to invest tons of time and effort into mastering their complexities.
The Elegoo x emoji Centauri Carbon 2 Combo aims to change all that by plastering a highly capable 3D printer (that’s still accessible to newbies) with a bright yellow, smiling veneer. And that’s about as deep as the emoji collaboration goes, a thin skin painted on what is, at its core, a nearly identical iteration of the company’s existing Centauri Carbon 2 Combo. While it may be slightly misleading, the superficiality of the branding isn’t a bad thing, because, it turns out, the Centauri Carbon 2 is an excellent printer.
Unboxing and setup
The emoji design on the plate transfers to the models, giving them a cool patterned bottom.
My first impression, lifting the Centauri Carbon 2’s shipping box, went something like, “hot damn, this is heavy.” Unboxing was a bit of a chore: It involved removing and detaching a massive amount of packing material, tape and screen protective film, though since the printer shipped from China, I was happy to see it so securely swaddled.
I was slightly less pleased with the setup procedure. As the headline of this review suggests, I’m a 3D printing novice, and while I’ve seen videos of experienced creators setting up the Carbon 2 in 15 minutes, it took me a little over an hour.
There’s a lot of unwrapping, attaching, positioning and screwing, and the English version of the manual suffers either from a slight localization issue or the assumption that the person putting the printer together has some experience with them. This printer may be marketed toward kids, but there’s no way a child is going to assemble this by themselves.
In the pro column, even when the manual referred to a part that I wasn’t familiar with, the illustrations were just detailed enough that I managed to put the machine together on my first attempt without any lasting problems.
Elegoo includes a handy package of all the kit you’ll need, including screwdrivers and hex keys, though I was glad to have my own tools at hand because the provided hex keys, especially, were on the shoddy side.
Software and first print
By contrast, setting up the software necessary to start printing was a breeze. Elegoo includes a USB key preloaded with installation files for its proprietary slicer software — the program you’ll need to interpret 3D model files and prepare them for printing.
It’s based on a popular slicer package from another brand called OrcaSlicer, and it was a breeze to get up and running. The USB key also includes some sample models you can play around with, or there’s an Online Models section in the slicer where you can find tons of user creations.
Part (most, really) of the emoji tie-in is that a number of emoji models are included in the machine’s local storage by default, so if your heart craves a yellow face blowing a kiss, Elegoo’s got you covered. There are also some other small touches, such as the reverse of the heating plate being covered with emoji, so you can imprint them on the bottom layer of a print.
Elegoo Centauri Carbon 2: Emoji edition specs
| Build volume | 256 × 256 × 256 mm |
|---|---|
| Printer dimensions | 500 × 480 × 743 mm (with CANVAS system installed) |
| Hot end | High‑temperature direct‑drive hot end, hardened for technical materials |
| Nozzle | Single hardened steel nozzle (CANVAS 4‑color through one nozzle) |
| Hotend max temperature | 350 °C |
| Print bed max temperature | 110 °C |
| Max speed | Up to 500 mm/s |
| Supported material | PLA, PETG, TPU, ABS, ASA, nylon, PC and other common technical filaments |
| Build plate camera | Integrated AI camera for monitoring, timelapse and failure detection |
| Color support | CANVAS 4‑color multicolor printing |
| Storage | Onboard storage for print jobs (plus external USB support, depending on mode) |
| Slicer | Elegoo Slicer and OrcaSlicer recommended |
Perhaps my cynical heart is too hardened to appreciate them, but I opted to skip the emoji figures and jump to something a little more interesting and complex for my first print.
I chose one of the files on the USB key, a small Buddha figurine with a fair amount of fine detail. For this print, I did everything from the printer itself, which includes a handy little touchscreen on the front of the machine where you can browse local files, load filaments and print.
Speaking of loading filaments, the Centauri Carbon 2 lets you preload four on the side of the printer, and each has its own tube, unlike some other printers which only include a single space for filament or force multiple spools to share the same tube, slowing down the process every time you want to change colors or materials.
The Canvas, which is the device on the side of the machine that the filament feeds into, has an RFID reader, and Elegoo sells filament spools with matching chips so you can quickly scan them. The printer will automatically recognize them and add their data.
The emoji-branded filament Elegoo sent me with the machine lacked the RFID functionality, so I had to program the data in manually as I added each spool, which is a shame. That said, all I had to do was choose the filament type and brand, tap in a couple of details on the touchscreen and the filament loaded smoothly into the print head.
The Canvas system on the Carbon 2 allows you to print up to four colors at once.
Then it was time to print. I selected the model from the browser built into the machine (with the USB key plugged into the port next to the touchscreen), chose the white PLA filament and launched. Printing directly from the machine was dead simple, and within about half an hour, I had a completed, very lightweight Buddha figurine.
I was impressed by the printer’s ability to capture fine details on the figure, especially around the folds in its sleeves and headdress. Though it’s not a highly complex miniature on the level of a Warhammer 40K or Warmachine, the printer executed it nearly flawlessly.
The only minor issue I encountered during the first print was that the machine vibrates pretty significantly while it’s working, and the table I had it set up on initially wasn’t the most stable. However, Elegoo included anti-vibration feet (that were previously sold as an add-on) by default with the emoji-branded Carbon 2, which seemed to help, and once I’d moved it to a more stable platform, the vibration wasn’t an ongoing issue (though it was still noticeable).
Using the slicer
Launching prints remotely from the slicer is also a simple process. You can open or drag and drop a model file into it, or choose files that are already on the printer’s local storage or an attached USB device. If you don’t want to make any changes, you can slice the model, which translates it into G-code that the printer can read and immediately start printing.
If you do want to toy around with the model, the slicer’s controls are excellent. You can rotate, resize, add simple geometric shapes or lay the model on different faces with incredible ease, even if you’re a green novice like me. You can also delve deep into more esoteric settings such as infilling (the structural supports inside the model), layer height, shell density and much, much more.
While the language may be intimidating at first, after watching a handful of YouTube tutorials, I felt familiar and comfortable enough to begin modifying even some of the most complex settings and dimensions of a print, and the ElegooSlicer feels both very approachable and very powerful at this level.
I started flying through additional prints. I built a chute to catch the discarded filament that shoots out the back of the machine (I found it a bit odd that Elegoo doesn’t include a built-in system for capturing this debris), then tackled a relatively simple but lengthy print before knocking out the CNET logo sample.
While the D&D mini didn’t do as well, the other models are excellent.
Then I moved on to more complex stuff: a 20-sided die that required me to first print the core icosahedron and then 19 face plates (the 20th side was the base and didn’t require a plate). They were all printed on a thin, single-layer sheet and then glued to the die.
I also knocked out a dice tower (yes, I’m a nerd, if you hadn’t gathered as much), and to really put the Carbon 2 through its paces, attempted a complicated, non-copyright-infringing “Grimdark” model, which prints in four parts.
It’s a Warhammer-inspired trooper with a backpack, sword, complex armor and a ton of fine detail. The creator was thoughtful enough to include supports, which help buttress parts of the model that overhang, so the machine isn’t printing in thin air. You can also get a version without supports, and the ElegooSlicer includes an option to add them in automatically, either the standard, post-like variety or “tree” supports that branch and work better for less geometric, more organic shapes.
The results were mixed but generally very solid. It struggled with the sword’s thin blade, leaving the lower edge more of a lattice than a solid, and had some issues along one edge of the base. Overall, I was struck by how well it managed the tiny details. Little flickering candles around the trooper’s feet, and even some of the smallest details of his helm and armor, came through. This is an FDM printer using PLA, and it’ll never rival a resin printer when it comes to capturing microscopic detail. But under the circumstances, it performed admirably. I also could’ve slowed the print speed and decreased the layer height to print at a higher resolution, which likely would’ve improved the final quality.
Final thoughts
For a multi-filament printer, the ELEGOO x emoji Centauri Carbon 2 Combo is very affordable, currently available for $449 directly from the manufacturer. It performed either as well as or better than expected in every print I tried, and I was very impressed with how easy to use the slicer software and on-device interface were. Additional features — such as the ability to capture time-lapse videos of a print with a camera mounted inside the print bay and its relatively quiet operation (due to multiple, well-distributed fans) — were the icing on a delicious, emoji-themed cake. But to be perfectly honest, if none of the emoji branding were in place, I wouldn’t miss it a bit.